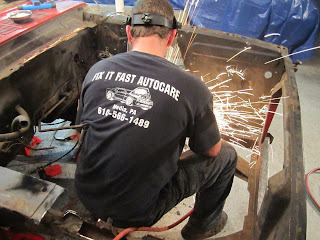
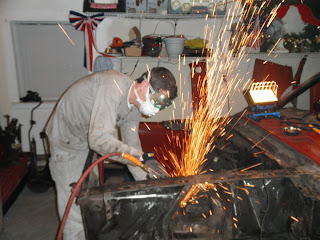
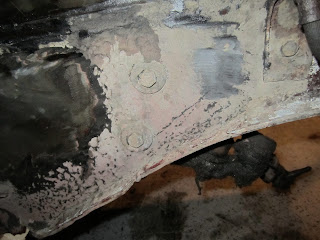
So last night my buddy Jesse (who owns Fix-It-Fast Auto repair in Media PA and is AWESOME) came over with his torch and we did some cutting, but also a lot of prep and measuring and thinking.
We have measurements written down, but i haven't copied them in. If you're doing frame work, this is probably your best bet for measurements:
http://img.photobucket.com/albums/v393/rusty428cj/64-65MustangFrame.jpg
Tomorrow I will be making a datam line to get the car level, once we do that the rest of the front can come off now that I have the proper measurements for the frame rail lengths. I also caved last night and bought all new aprons and a new radiator support for the front so we're not welding any rusty shit together, ALL NEW!
So anyway the only thing left to do is post pictures of Mr. Jesse Fast cutting last night (thanks again dude):
Friday, September 30, 2011
Wednesday, September 28, 2011
Day 39: Removing the Steering Column and Some More Cutting/ Prep
I've been slipping lately. One of the things I have to do on this blog is update you guys with all the parts I've been buying and all the things that are coming in.
A couple days ago the new front suspension/ steering/ brakes/ frame rails came. In case you aren't aware, I've decided to do Rod & Custom's front M2 suspension upgrade. Here's a pic of the parts (crap cell pic, sorry):
In that pic (which I know is hard to see) there is the new:
- Front Crossmember
- Engine Mounts
- Master Brake Cylinder and power booster
- Rack and Pinion Steering
- New v8 2" drop spindles
- 11" Disc Brakes
- Steering Column Conversion Kit
- New Calipers and Pads
- Shocks and Struts
- Upper and Lower Control Arms
- And all the necessary hardware
Check out Rod & Custom if you're interested!
I have a ton of other stuff coming, and I need to go through all the CJ Pony Parts orders I've made as we went along and catalog that as well.
But as of now, ALMOST everything is ordered and at the house waiting. The only thing left is the engine.
OK so last night:
1. Remove the Steering Column and Box
- Our steering box still has the steering rod and tie rod ends connected to it, but that's ok, it's all trash now basically.
- Remove the Firewall Insulation
- Remove the horn cap by rotating it counter clockwise (we did this a long time ago as you can see in the pictures)
- Remove the steering wheel nut that holds the steering wheel to the steering shaft inside the column. Then attach a steering wheel removal tool to the wheel bolt holes and pop that sucker off!
- Next disconnect the wire harness for the turn signal and horn from the middle of the column:
- Next unbolt the 2 bolts that hold the bracket to the dash:
-Finally slide that column off the steering shaft. We already unbolted the steering box from the frame rail, so after you slide the column off, just pull that box out from the engine bay (carefully!):
2. We cut out the driver's side shock tower!
This was a lot of fun:
Wednesday, September 21, 2011
Days 28 - 32: Healing and some cutting...
Yeah so since the last post my finger has just been kept straight and clean, couldn't really do much.
Last night though a couple guys came over and we did some stuff. We cleaned up the garage pretty good, put all the tools away that were just lying around, re-organized all the wrenches, cleaned off the work bench... etc etc. It was a long time coming.
BUT we DID get some cutting done in the engine bay.
So in case I haven't mentioned this yet we decided to go with a MII front suspension kit from Rod and Custom. In order to install it you gotta do a couple things. You gotta remove the old sway bar brackets, the old cross member, and both shock towers. The new set up has it's own cross member that everything bolts onto. So as you probably can guess those frame rails need to be super strong.
Last night we started by removing the rotted out battery apron and shock tower on the passenger side. Once we got down to the rail, it's actually not in horrible shape inside. We bought 29inch frame rail replacements (29 inches from the front) and it looks like 29 inches back the metal is fine to weld to.
Here's what the process looked like:
More to come!
Friday, September 16, 2011
Day 27: Sway Bar, Fuel Line, Steering, Wiring, Brake Master Cylinder and Motor Mounts
So despite the fact that I ripped my finger open last night, we did get some work done before.
1. Removing the Sway Bar:
You've got 2 hangers on either side of the front with 2 bolts and nuts each.
2. Fuel Hose to Fuel Line in Engine Bay:
There's a fastener holding it tight, we just cut the hose off, everything must go!
3. Steering:
Well we started taking apart the steering, but we couldn't get the steering box off the steering column.
But what we did so far was remove the bolts from the steering rod and steering box assembly to the frame rails. On the drivers side with the steering box there's 3 bolts and on the passenger side there's 2:
Once we get the steering column removed we can seperate it from the steering box and pull everything out at once.
4. Removing the engine bay Wiring!
Basically what you want to do here is label EVERYTHING. You've got two wiring harnesses in the engine bay, one that goes towards the passenger side and one towards the drivers side. They meet at the relay on the passenger side. We just labeled as much as we could and kept it all together as one large piece to be put back in if we don't get new harnesses and wiring.
5. Removing the Brake Master Cylinder:
Basically the master cylinder connects directly to the firewall with 2 bolts. Behind the master cylinder the brake pedal connects to a piston that pushes the brake fluid into the master cylinder and through the brake lines. Remove the brake lines first, then the master cylinder:
6. Removing the Motor Mounts
3 bolts each, to the shock towers:
That's all. After that I cut myself open... ugh.
Hopefully work will resume soon!
Subscribe to:
Posts (Atom)


