So first of all the last time we updated we had just removed the brake/clutch pedal assembly and got the wiring harness disconnected and ready to be removed.
The next thing that happened was we got the new floor supports welded in.
1. New Floor Pan Supports!
We first had to move the jack stands from under the floor pan supports to under the cross member which means for the first time we had the weight of the body on our new cross member!
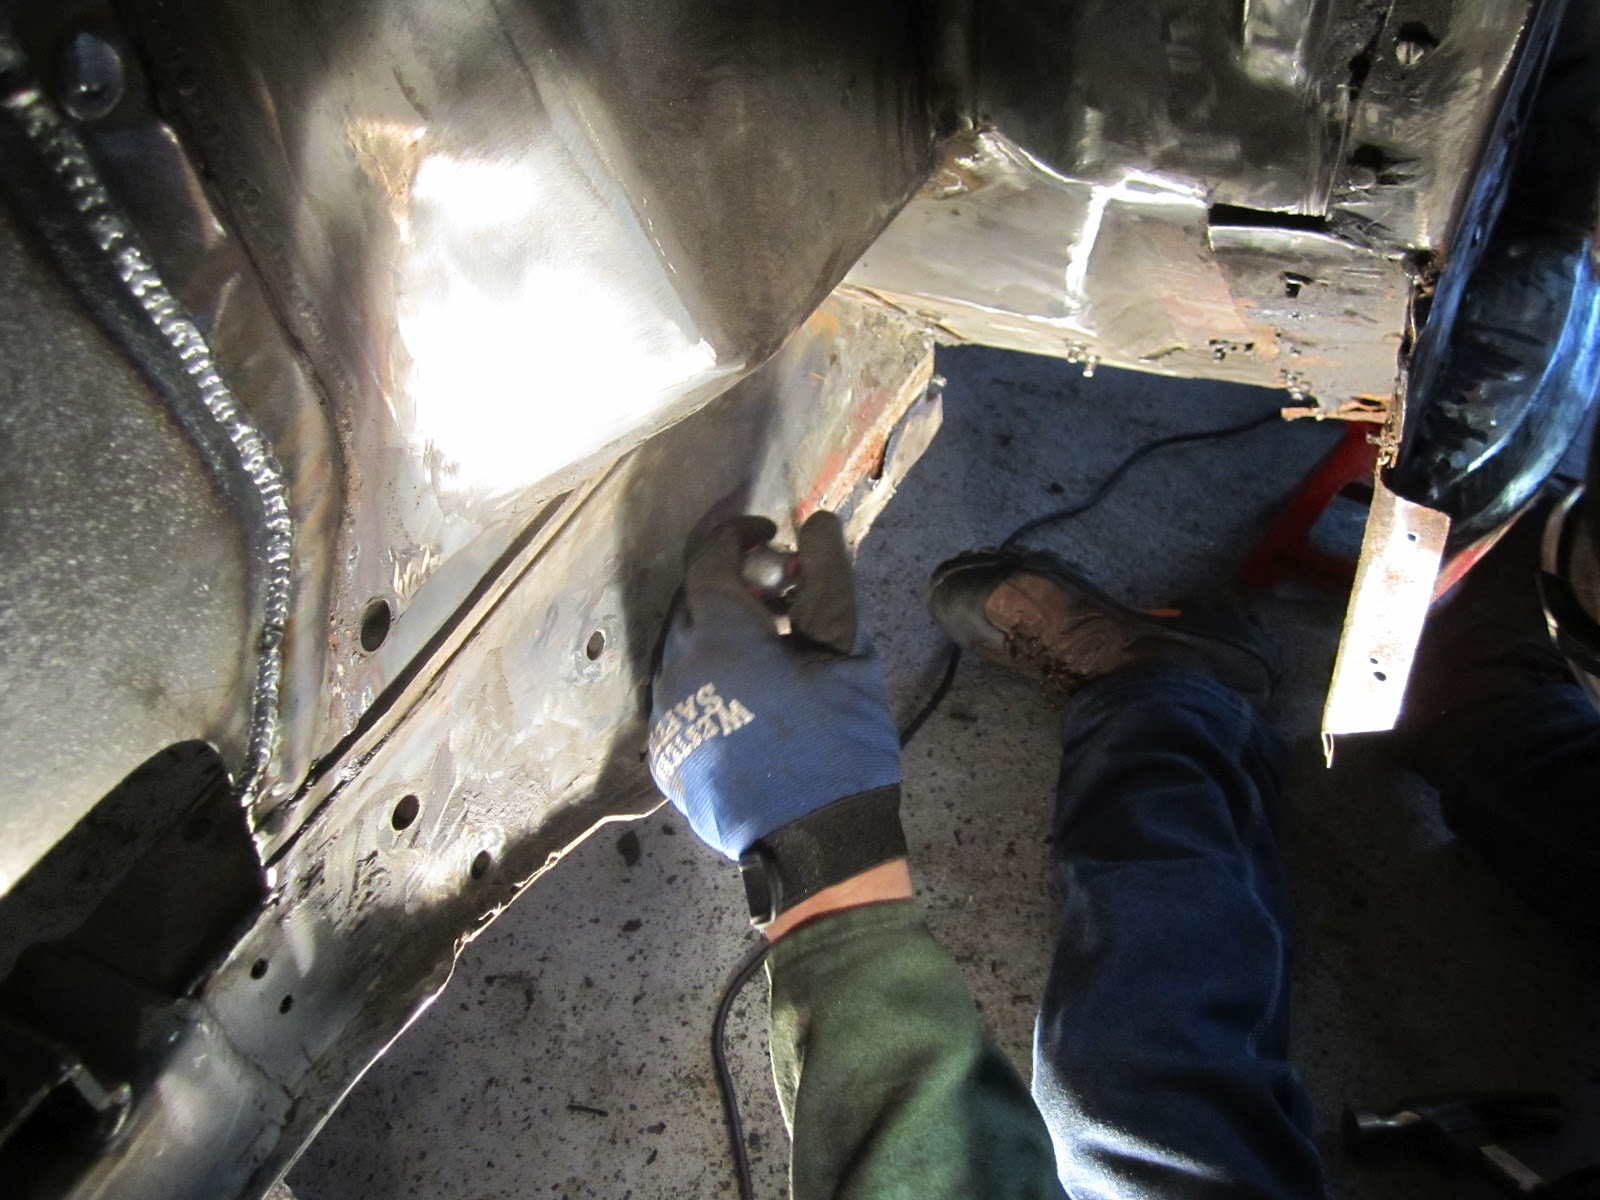
After that we had to very very carefully remove all the spot welds that hold the floor pan supports to the frame rails and floor pans. We started with the drivers side first, it should go without saying that you want to take as many pictures and measurements as possible before removing structural body metal:


To remove the old supports there are 3 things you have to do. First you have to remove them from the floor pans themselves. In my mustang the previous owner replaced the floor pans and bolted the pans to the supports. We drilled through the bolts and cut with a grind wheel through some of the spot welds that he made:

Next it's easiest to just cut the old support in two. The transmission mount housing is connected to the floor support. Behind that (towards the back of the car) there's no frame rail underneath the floor support. So what we did is we cut the support around the transmission mount and then simply cut it out behind the mount:


It took a lot of pulling and prying, the original owner bolted, rivited, and spot welded the support to the floor pan!
Next we worked on the part of the support that sits over the frame rail. It actually caps over it, and unfortunately it was never sealed properly so a ton of moisture got in there. As we started pulling off the support, the frame rail was just trashed underneath:

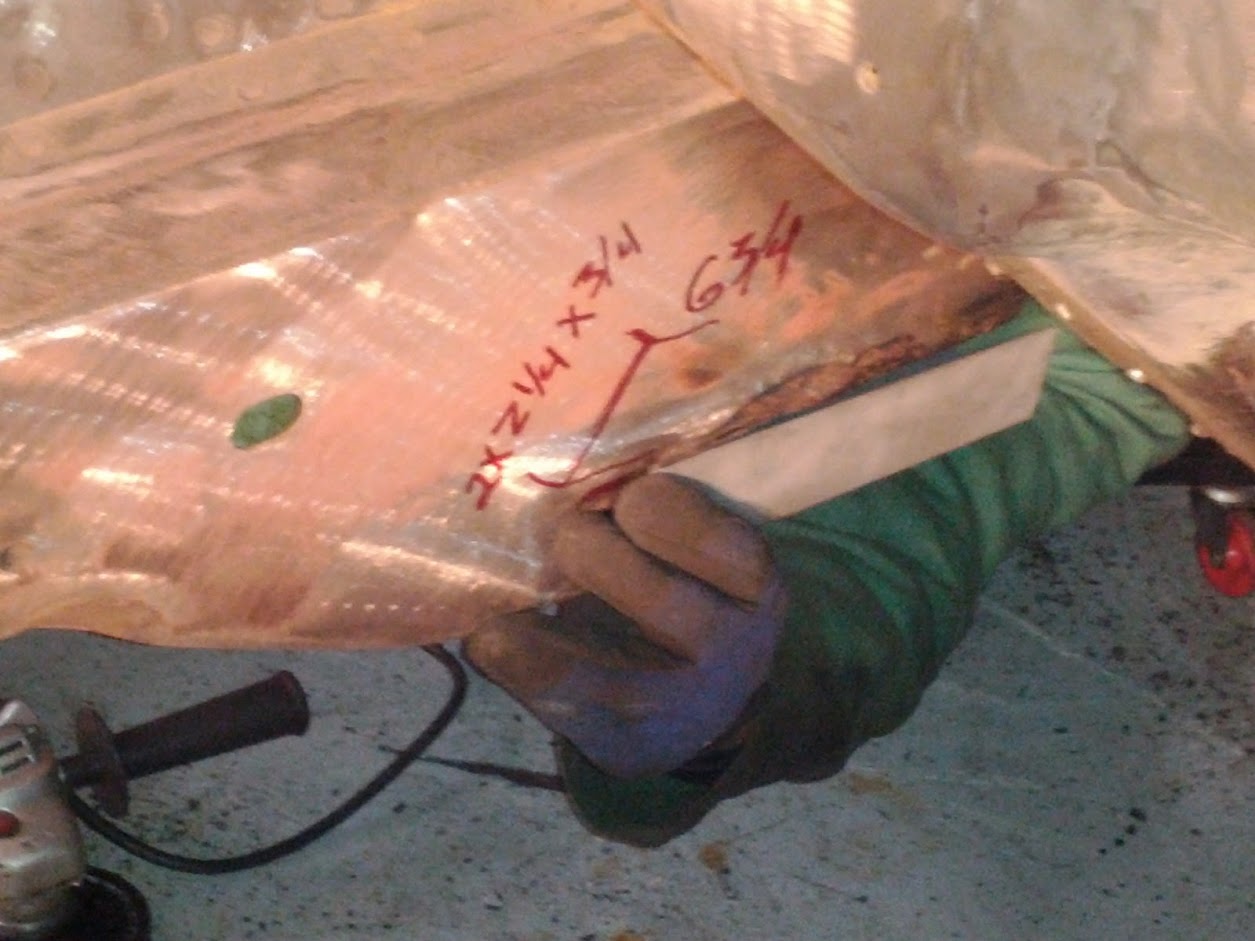
What we ended up deciding to do was to cut a "J" piece out of the frame rail underneath the support and replace that too... I told you guys, when this car is done there won't be a rusty spot left anywhere!


Once it was all cleaned off and no remaining rust was visible Jesse fabricated a new "J" piece to replace the old frame rail:


We then placed the new floor pan support in place and got it clamped to be welded. We did it one at a time to reduce the risk of the unibody repositioning itself.


After that we repeated the process on the passenger side:


2. Seams, seams, seams! Welding the floor pan seams takes forever!
I didn't snap any pictures of this, but Jesse Fast at Fix it Fast Auto Care and I worked for weeks removing each and every bolt on the floor pan one by one with a drill and replacing it with a spot weld, then Jesse went through and started welding all visible seams shut. We've left some seams that were filled with filler, we're going to wait until the sand blasting is done to finish those seams but rest assured that when done this car won't have a single seam on it's unibody frame that isn't welded shut.
3. Replacing the Rear Torque Boxes...
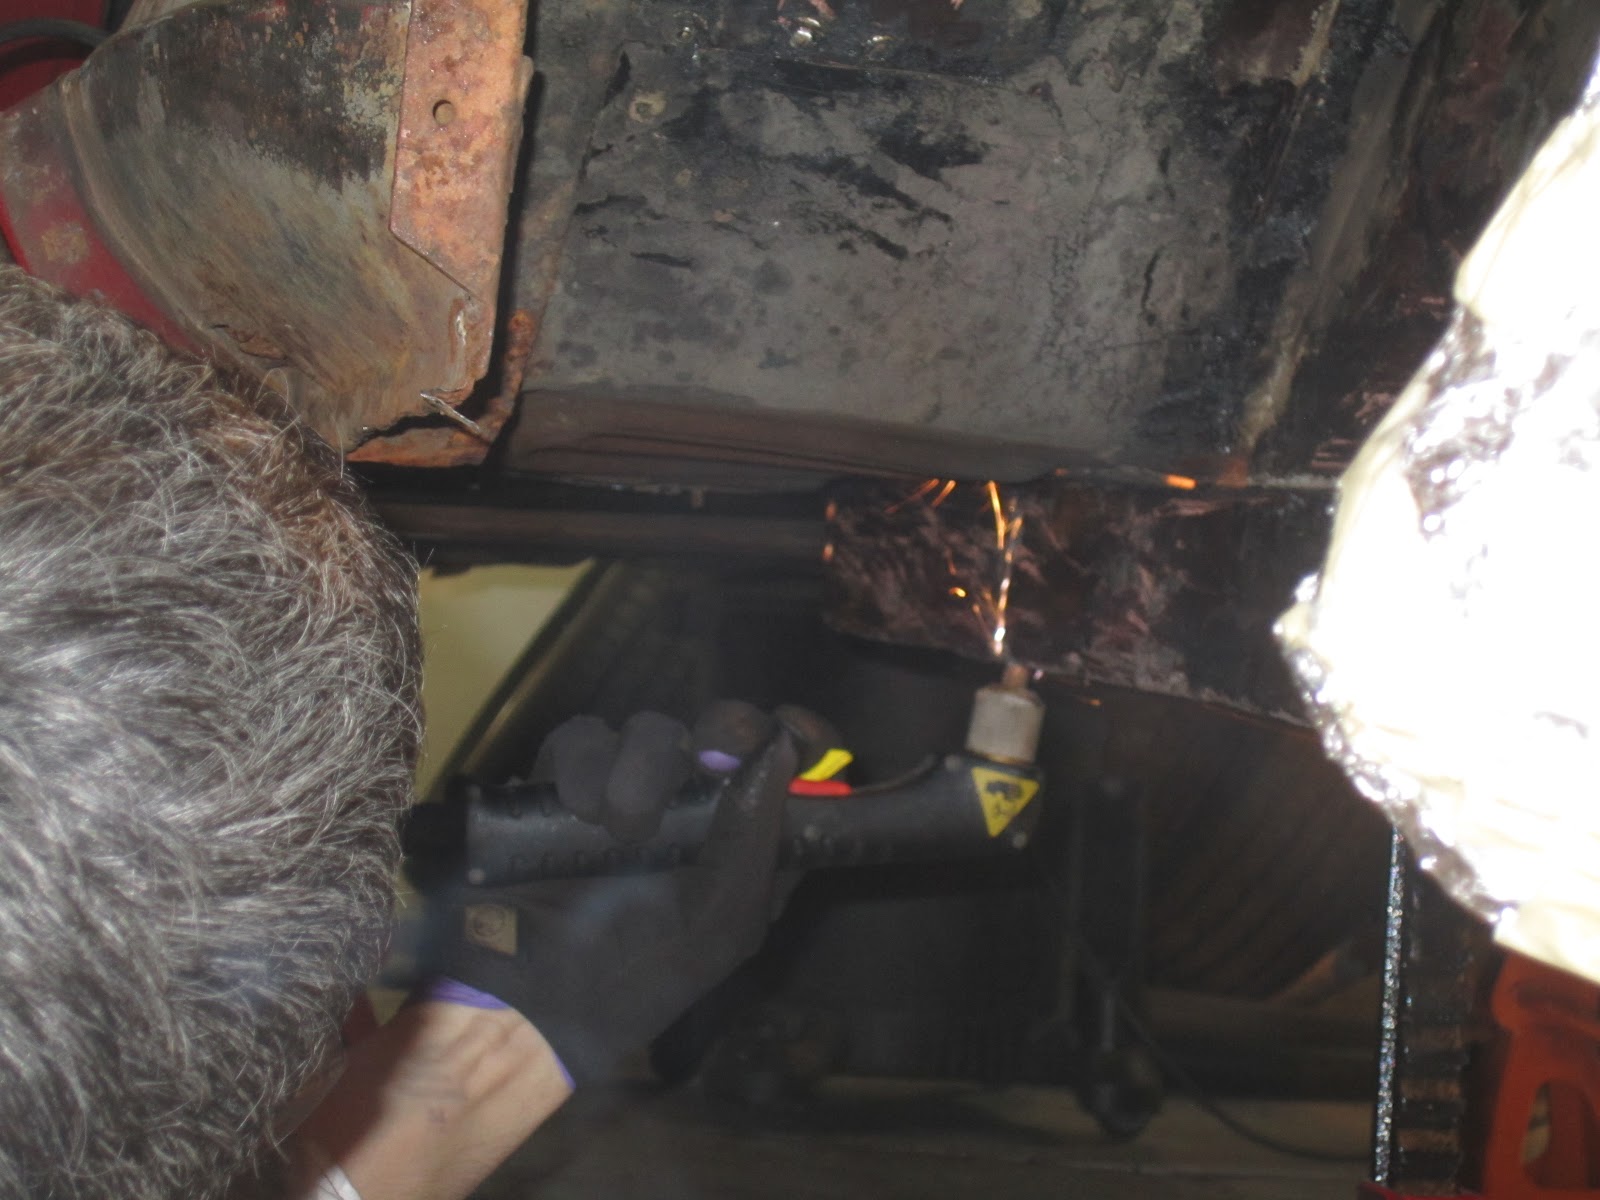
Next we did the rear torque boxes. These were a huge pain in the ass. Not only do you have to take a ton of measurements to really make sure that you're not screwing up your rear end placement, but the boxes we ordered from Mr. Mustang were delivered without wrapping and came kind of bent up, we had to use the old ones as models and bend them back into place a bit!
Plus you can't leave your jack stands underneath the frame rails since you will be cutting them out. We moved our stands to under the rear corner of the rockers.
Aside from that, removing the old ones was a huge, huge, huge pain in the ass. The new boxes comes with a small section of rear frame rail, we started by measuring that distance and cutting a line in the old frame rail for the new piece to match up.
Then we cut away the floor pan from on top of the torque boxes.
After that you gotta get the torque box off of the floor pan, the rocker wall, and the rear seat pan as well as the vertical pieces of metal that hold the rear seat and the walls of the car up. I was pretty sure as we pulled them out we were gonna crumple the car up. Obviously we did these 1 at a time.
Once we had the new one sitting in place we welded it in and then repeated on the passenger side. We didn't completely weld everything yet, we're waiting for the sandblasting to really get the seams cleaned out and rust free, but it's in there nice and tight!


4. I sold the old wheels, tires and hubcaps!
Also while we were away we said goodbye to the old 4 lug wheels, someone who was doing an all original restoration needed them for his 6 cyl 66 convertible.
5. Building the suspension and getting her back to rolling!
Next we GOT THE CAR BACK ON WHEELS.
That's right, we built the front and rear suspension and got it back to rolling. Here's the pictures:


6. Finally removing the remaining interior items...
This actually happened in a couple different stages when we had free time, but I'm going to pretend we did it all at the end.
We had to remove the remaining interior items which were:
-Glovebox
-Stereo Harness
-Wiring Harnesses
-E-Brake
-Rear 1/4 Panel windows/ regulators
-Ignition/ Headlights/ Windshield Washer Bezels
-Windshield Wiper Motors
I know that I normally document all of the tear down for these things but for now I will just add the pictures and come back to it later, I've said enough:


Annnnnd let's just look at Frankenstang on wheels one last time, it's too good:
-Tim
No comments:
Post a Comment