Thursday, September 15, 2011

Days 20 - 26: Drive Shaft, Engine and Transmission

The past couple days have been the funnest so far. I mean sure, we did a lot more grinding. In fact about 4 nights of just straight grinding, scraping, sanding, and wiping with metal cleaner...

BUT we also got the transmission and drive shaft dropped as well as pulled the engine. We're pretty damn close to doing the body/metal work, and then... PAINT.

1. Pull the Drive Shaft out of the transmission:

We just kept the yoke connected to the drive shaft and slipped it out of the trans. My gasket is busted so it leaks oil, just threw an old coffee pot under there to collect:


2. Drop the Transmission:

- A. E-Brake Assembly (on transmission mount bracket, see picture directly above): It's all tension based. There's a spring holding the bracket and a cable down from the handle in the car. Pull the cable out of the bracket and pull the spring off, it all comes down.

- B. Transmission Wires: Theres 2, an ignition kill switch sensor that goes up through the floor into the car, and the speedometer cable which goes up through the firewall into the dash (the speedometer cable has a bolt to the trans):


- C. The Trans itself:

OK first thing you want to do is disconnect it from the bell housing (we chose to leave the bell housing attached to the engine). To do this there are 4 bolts from the trans to the bell housing:


Next put the trans on the jack:


Then there are 2 bolts that hold the trans bracket to the car body.

Once you have these off you need to transfer the jack to the engine. We did this by having sweeney hold the trans while we moved it to the engine.

Before you attempt to wiggle the trans out, you gotta remove the shifter. It's 2 bolts (with screw heads) accessible from inside the car down the hole.

Then just wiggle the trans out and down:


Note: Speedometer cable is still connected in picture, we waited till it was dropped to disconnect as we found out there was enough clearance.


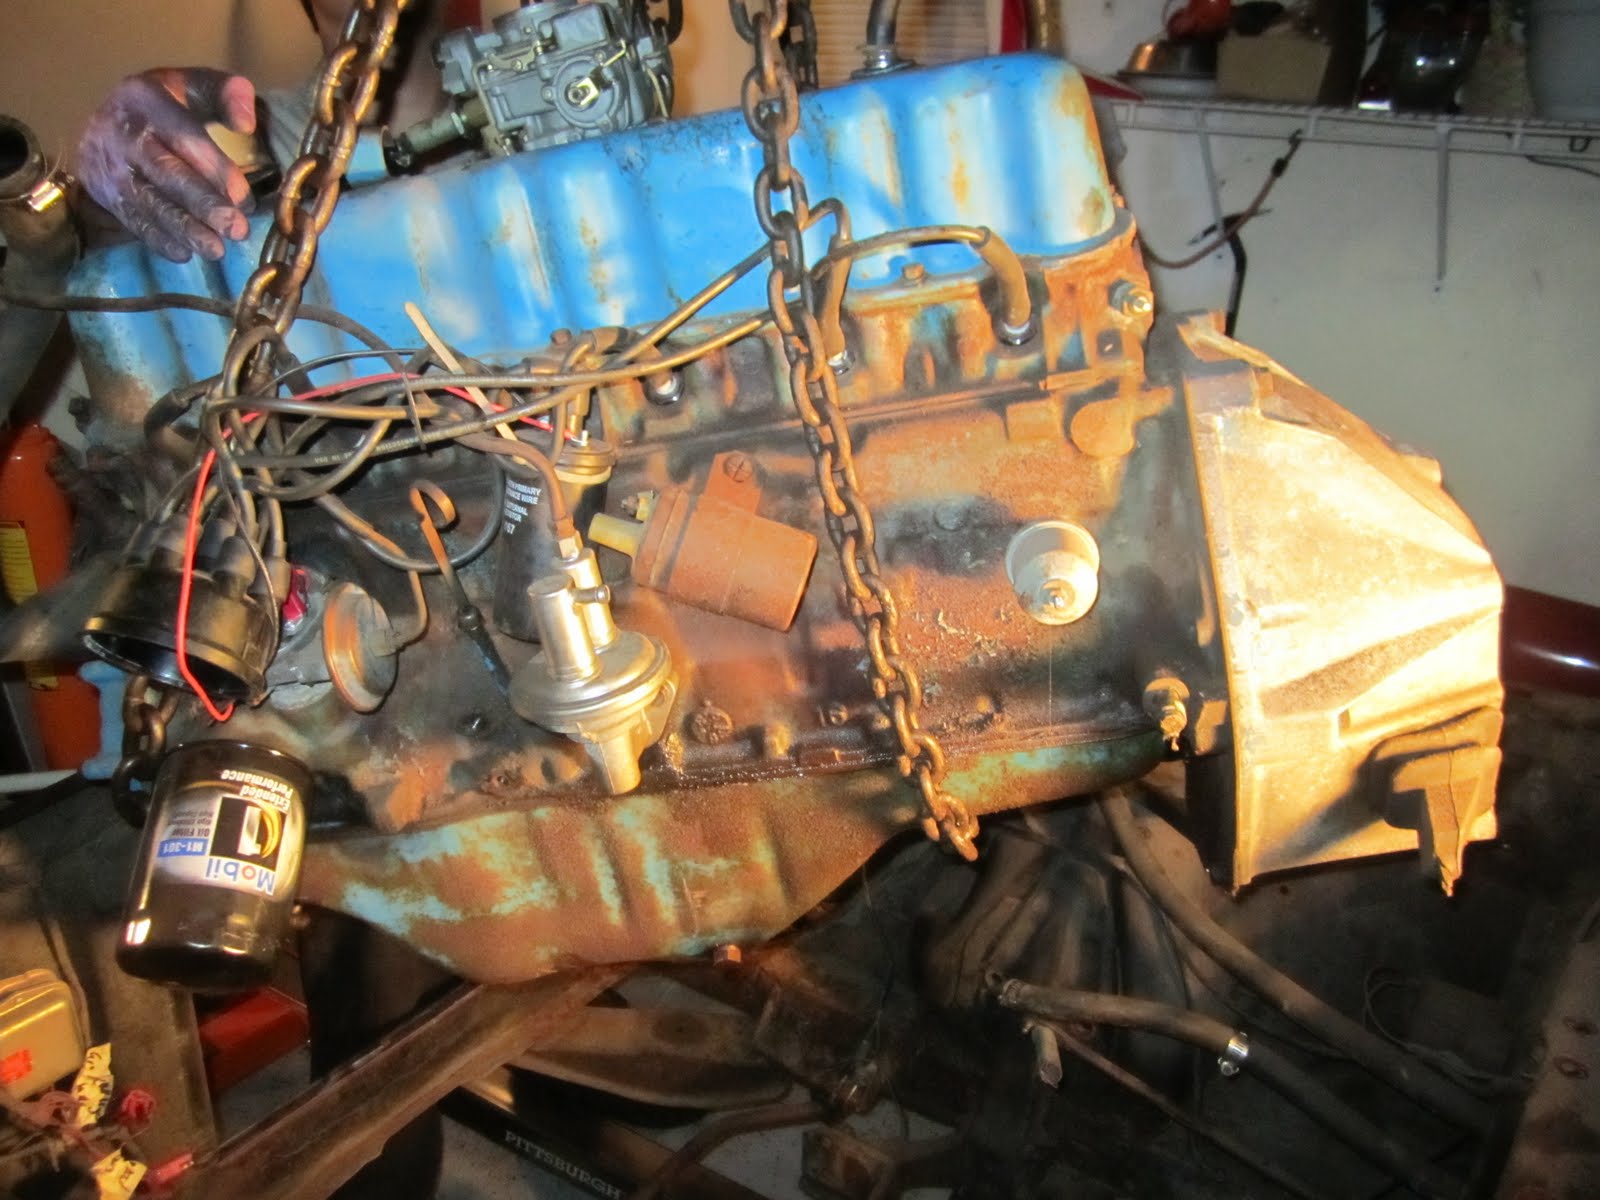
3. Pull the Engine!!!

OK I'm gonna list the steps we took first, then post the pictures.

- A. Remove the top of the carb (air cleaner assembly)

- B. Disconnect the Heater Core Hoses

- C. Disconnect the Gas Pedal Linkage

- D. Disconnect the Clutch pedal from the bell housing

- E. Disconnect the Fuel Line

- F. Disconnect power cables from alternator to ignition relay (3 power cables plus 1 ground to bolt on engine where battery ground cable connects).

- G. Coolant hose to fuel filter

- H. Motor Mount Bolts (2 on each mount)

- I. Remove Fan

- J. Set up lift and remove that bitch!


Awwwww yeah.

Thursday, September 8, 2011

Days 18 - 19: The Rear

The majority of the work over the past couple days has been grinding... Here's the most recent shot of how the car looks:


But as you'll notice, we did also drop the rear! It wasn't incredibly hard, here's what we did:

1. Disconnect the Drive Shaft from the Rear:

This is pretty simple, you have 2 u bolts with 4 nuts holding the pin to the rear that slips into the drive shaft. Remove the nuts, remove the u bolts, and then let the pin hang for a second (it's much easier to remove the pin once you drop the rear since there's pressure there between the trans and rear):


2. Remove the Shocks From The Body:

The top bolt to the shocks is accessible from inside the car. Underneath where the rear bench seat goes there are 2 rubber covers, pull them up. Right under those you will see the nuts and bushings. Remove these, bag and tag:


3. Disconnect the E-Brake Cable:

From the front of the car you can see where the single cable comes down and has a bracket that turns it into 2 cables to run to the two drums. Disconnect this bracket and all the hangers holding the cables up. Lay down on the floor for now.


4. Rear Vent Hose (Housing to Body):

There's a hose coming out of the rear housing that runs to the frame rails, this is for overflow purposes, just pull it off and set aside.

5. Finally... The Leaf Spring to Body Brackets/Hangers

OK basically you have 1 very long bolt at the front of the leafs to the body for both leafs and 1 in the back of the leafs to a hanger, both bolts have bushings and are very tight. You need to put a jack underneath the leafs to raise up slightly to loosen the bolts.


Finally just roll the rear out of the way. We still need to dis-assemble the u-bolts and bracket that hold the leafs to the rear, but all in good time.

For now... We Grind/Scrape/Sand...

Tuesday, September 6, 2011

Days 11 - 17: Hood Springs, Passenger Side Suspension, Gas Tank, Exhaust and of course... more grinding

So days 11 and 12 we chilled, needed some time off to do research. There's a lot of options on the table for how exactly we want to rebuild this car. More on that later once we make our final decisions, I will definitely be posting what we choose, where we get it, and how much it all costs.

OK so getting into day 13:

1. Removed the Hood Spring Units:

Pretty straightforward, needed to get them out of the way to keep grinding. There's 3 bolts, accessed from inside the engine bay, and they bolt into 3 nut clips that are welded to the body.


2. Removing the Passenger Side Front Suspension

All of this is detailed in my previous post about removing the driver's side front suspension. Please see that for reference.

Day 14 and 15:

3. Removing the Gas Tank:

-First you need to drain it, locate the drain plug on the back right hand side of the tank. Make sure you know how much gas is in there and choose a bucket that's large enough.


- Then you need to remove the filler arm assembly from the top of the tank. Unscrew the gas cap and you will see underneath there are 5 screws with nuts (on the inside). Remove the nuts and bag and tag. There is also a rubber hose with 2 clamps to the tank itself, both clamps have a single phillip's screw that needs to be loosened:


 - Once you have that done you need to remove the fuel sensor and fuel line from the tank. There in the same place at the back of the tank. The sensor just pulls off, the line is connected with a rubber connector and 2 clamps that must be loosened and then wiggled off. NOTE: before you do this run the car to remove any extra gas in the line/tank. Once the car stalls you know you got it all.


- Finally remove the tank by removing the gas tank bolts from the trunk, they're all around the tank.


 4. Removing the Exhaust System:

OK this is done in stages, first thing you want to do is remove the muffler and tail pipe. What a huge pain in the ass this was, if I did it again I would probably remove it all at once and work on it outside of the car, but whatever, just know that if it's rusted together, separating it is gonna require some surgery.

OK stage 1: Remove the Muffler

To do this there are coupling brackets to the main down pipe, tail pipe, and one hanging bracket to the body of the car. Loosen the brackets and wiggle it off the down pipe and tail pipe first, then remove from the body. Mine were just plain stuck on no matter what we did, so finally I just cut the muffler brackets open and removed it, I can always get a new muffler, they're pretty cheap:


Stage 2: Remove the Down Pipe

The down pipe is in 2 sections, but we opted to remove it straight from the engine to the rear in one step. So first we disconnected the hanger at the rear (Note: Set up a jack stand underneath the down pipe to position it on so it doesn't drop!)


Next disconnect it from the engine and do the same up front (NOTE: The return spring for the accelerator is connected to the bolt hole for the exhaust, just disconnect it and let it hang from the accelerator):


5. Removing the Horns:

Basically just remove the connecting cable from the horn harness and remove the single bolt from the body that holds them on, there are 2 up front...

6. Removing the Radiator:

First you need to drain the coolent system. To do this we disconnected the lower radiator hose so that both the engine and radiator would drain into the bucket.

Next disconnect the upper hose and overflow hose.

Finally there are 4 bolts with nut clips that connect the radiator to the body, remove these and remove the radiator.


7. Removing the Radiator Overflow Container and Windshield Washer Fluid Reservoir (w/ motor):


For the radiator overflow container it's just a single screw at the top and the overflow line to the radiator which has already been removed.

For the windshield washer fluid reservoir it's 2 bolts to the body (one on top and one at the motor on the bottom). The motor is connected to the reservoir, disconnect power and ground cable from motor. Be careful when disconnecting if there's water still in it, hold your thumb over it to stop flow and then drain into a bucket or outside.

That's it for now, I think tonight we're pulling the engine and transmission, so get ready for that!

Tim